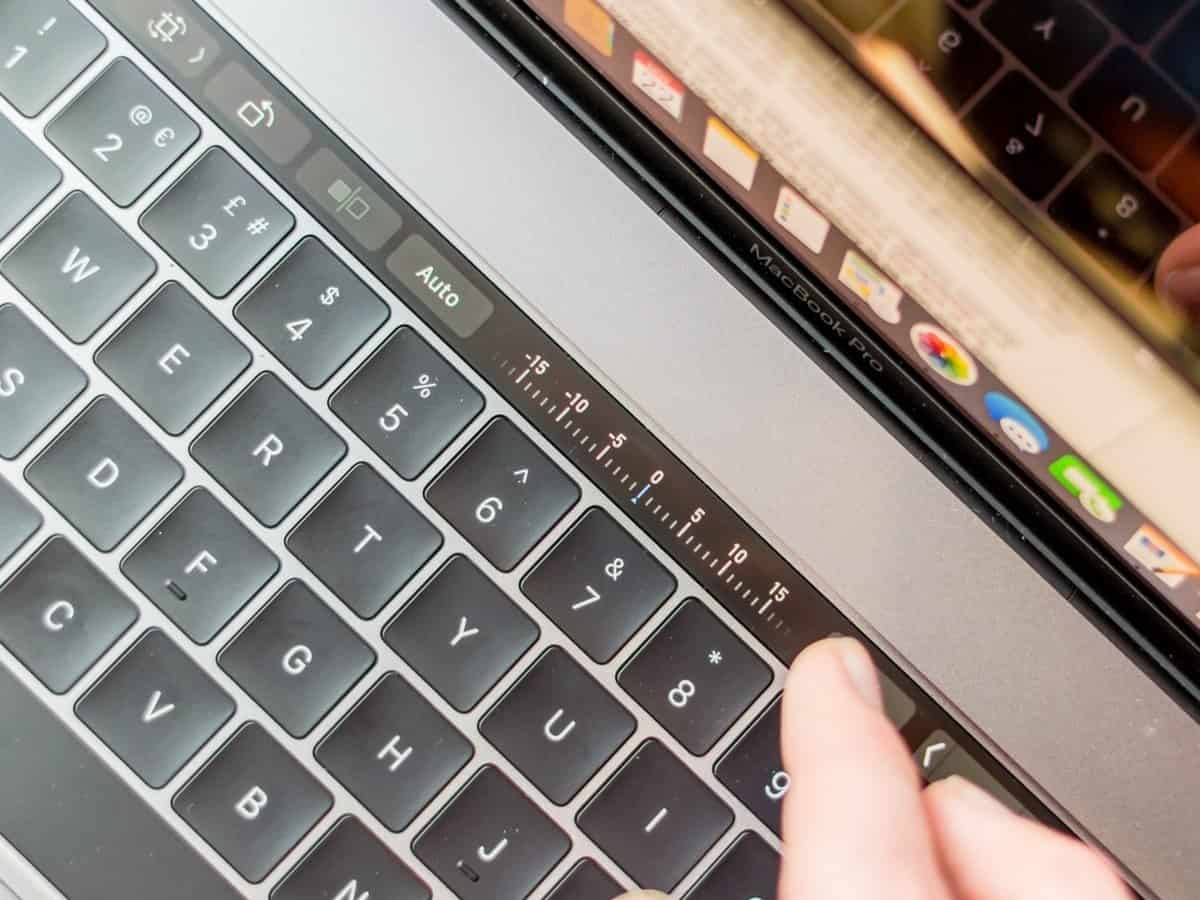
Touch Bar… yes, of the many novelties that Apple has brought to the new MacBook Pro, the Touch Bar is by far the most interesting and the one that stands out the most. These new virtual buttons allow more functions and bring usability in every application.
This new “toolbar” can be customized and that’s what we’ve shown you how to do today.
We’ve heard about this bar for a long time, we’ve seen “concept” images about it and many thought it was just an illustration of a novelty that would never exist. Well, after using this bar on a day-to-day basis and still without all the potential it will bring to macOS, we have to say that it is indeed worth it.
This touch area will grow in terms of usefulness, have no doubts and it will certainly create the trend and other brands will follow to put on current products. But, in the case of Touch Bar, everything is in the hands of the programmers and how they will take advantage of this new tool.
How to access Touch Bar settings

But like any macOS element, the Touch Bar can be completely configured, new buttons can be added, the current ones rearranged or the ones you don’t use can be removed. To configure the Touch Bar you only need to access System Preferences and choose the Keyboard option .
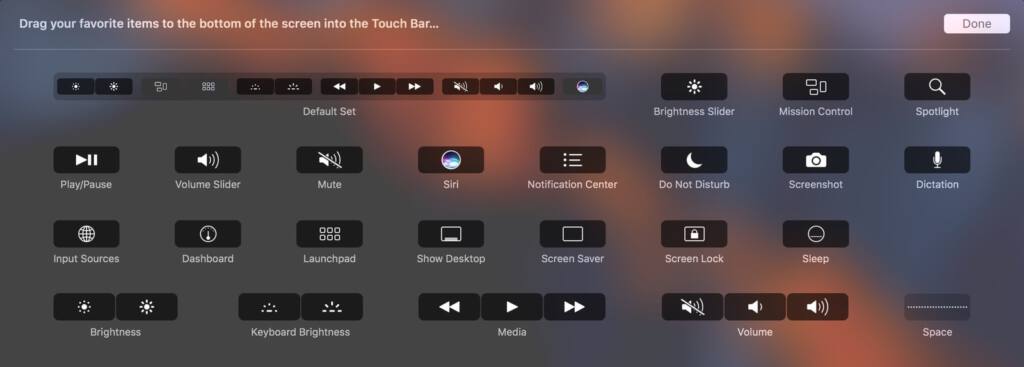
In this macOS configuration area, go to the Keyboard tab and there look for the Customize Control Strip button. By pressing this button, the screen will be entirely occupied by the Touch Bar configuration, where you will see all the available function buttons that can be used.
How to change Touch Bar buttons
The way to change the buttons and functions that are used in Touch Bar is simple and the same as many others that are used in macOS. Just choose the desired button and drag it to the desired position, already on the Touch Bar.
General settings
The first area you can access is the general settings, that is, the functions we have available in the most basic form of the Touch Bar. The available functions are also smaller, as this must be kept as “clean” as possible. . This is where the really most important shortcuts should be.
Then choose from the available list which buttons you want to add and drag them to the Touch Bar. In this area there is a lot of free space that you can occupy with the quick shortcuts.
After putting all the buttons in the right positions and to finish, you just need to press the OK button , which is next to the list of available buttons.
The expanded menu settings
In addition to the basic area, the general shortcuts, there is an expanded area with even more features that can also be configured. To do this and during configuration, click on the Touch Bar to expand it.
Now you will have access to many more features and many more buttons. Many are already applied, but you can rearrange them and/or remove the ones you don’t use.
At any time, they can also revert to the original configuration. To finish, as in the previous way, just press the OK button .
How to configure the Touch Bar for an application
When creating this novelty, Apple did not restrict it to its applications and any programmer can use it. There are well-defined rules so that this area does not become the center of attention and confusion.
To change the settings, if there are buttons and functions specific to the application, their configuration can be accessed in the View menu and in the Customize Touch Bar option. By choosing this option you will access the already well-known new configuration area, but which will now only have buttons related to the application in use.
Once again they just need to drag the buttons from the screen to the Touch Bar and arrange them in the desired place.
They can and should customize applications with access to the Touch Bar, so that they are tailored to the user. Remember, however, that not all of them have this option available.
Explore this new feature of your MackBook Pro and configure it for this according to your preference, thus increasing your Mac’s productivity and ease of use.

