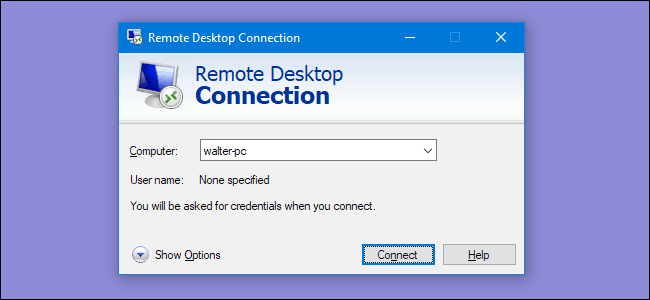
Windows Remote Desktop is one of the popular and useful Windows 10 feature, which will allow you to control computer from another device. Or it will allow you to control client computer if he needs help. You can also find that Windows Remote Desktop ( can be also called RDP or Remote Desktop Protocol. This Windows function is very useful for business support companies to try help costumers with software issues. But sometimes Windows Remote Desktop stops working. Many users report Windows 10 Remote Desktop Not Working all other the world who uses Windows 10 version. So if for one or another reason you are unable to use Remote Desktop after windows 10 1809 upgrade we have the fix solution. In this article we will show all posible solutions to fix this Windows 10 Remote Desktop Not Working error.
First you need to check firewall Settings
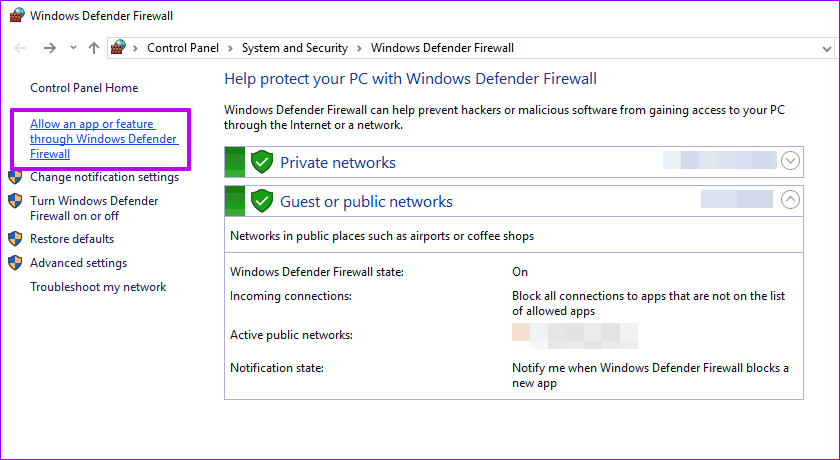
Many cases users can block all access for security purposes. So for this we need to check firewall settings. Please open Start menu and type firewall.
Next you just need to select Windows Defender Firewall option and tap on the ‘Allow an app or feature’ option on the right panel. Like in the picture down below:
Here you will see all apps and features apps have on your system configuration. So to change any settings you need just tap on the Change Settings button to activate the panel below.
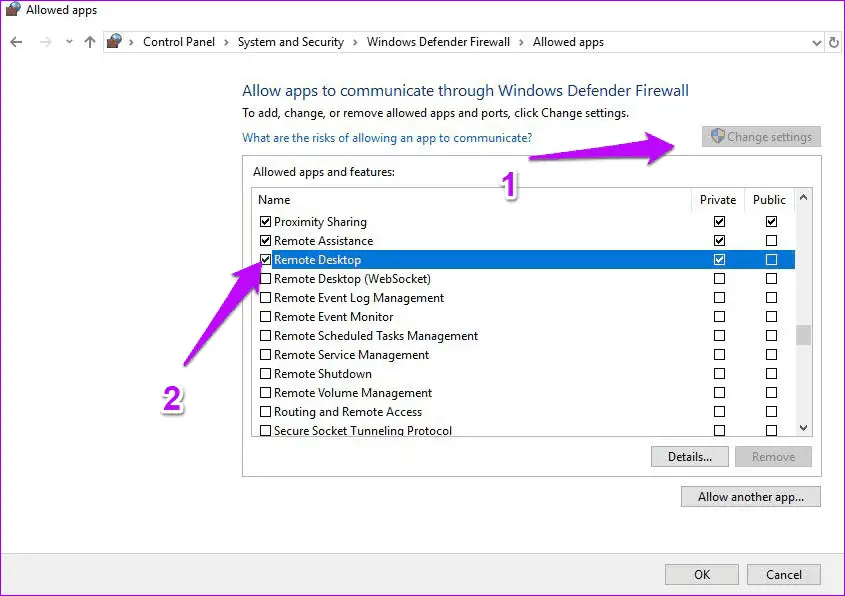
Search for Remote Desktop and make sure it is enabled. If not, please check the box beside it and grant access.
Also read: Windows: Software Reporter Tool Causing High CPU Usage
Disable IPv6 protocol
A lot of Windows 10 users report that if you disable IPv6 (internet protocol version) on your network adapter it may help to fix this error. So for this you need to follow this instruction:
- First of all press Windows button + R, type ncpa.cpl and ok to open network connections window.
- Right click on the adapter for which you want to disable it, and select properties.
- Search for the Internet Protocol Version 6 (TCP/IPv6), and uncheck checkbox.
- Click on OK, and then just restart your computer.
Enable Remote Desktop in Windows Settings
Just like before we shown you how to change firewall settings and disable IPV6, it is necessary to Enable Remote Desktop connection on Windows. For this you need to:
- Search for remote settings and you will find Allow Remote connections to your computer, open it by clicking.
- Now in the settings that will open check Allow remote connections to this computer and click OK to save changes.
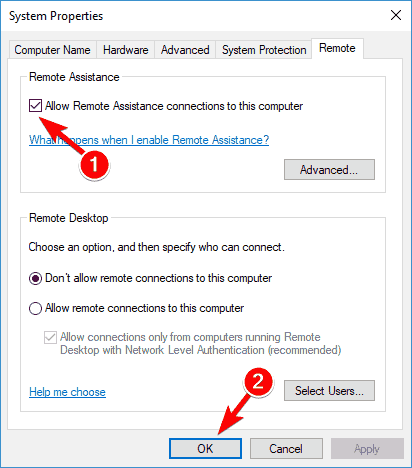
Remote connections are now enabled and now you can use it fr the very first time. In order to use this feature you have to make sure that your computer is not in hibernation mode or sleep mode, in that case you won’t be able to connect your computer in remote desktop.
Also read: How to fix Headphones not working in Windows 10

